
Mold is much easier to control ahead of time than to remove. However, once mold takes up residence in a building, you’ll need mold remediation to remove it and repair the damage that it causes. Here are the things you need to know before getting started on your mold removal project.
The Dangers of Mold
The mold cleanup process needs to be started as soon as you notice mold. There are different kinds of mold, and many of them are harmful and can spread very quickly. People can be exposed to mold spores through skin contact, inhalation, or ingestion. Because mold spores are so small and aerodynamic, it’s very easy for them to end up in the respiratory system. High levels of mold can lead to a disease called hypersensitivity pneumonitis—you might also know it as woodworker’s lung, malt worker’s lung, or farmer’s disease. It can cause allergic reactions, odors, and damage to your house and belongings.
Mold Remediation Best Practices
Removing mold means creating an environment where it can’t spread, grow, or settle. Mold can grow on materials that remain wet for 48 hours, which means keeping the area dry is essential. Ventilation is a very simple way of drying materials out. You should also ensure that there aren’t water leaks in your plumbing system, from the pipes to the sinks. Attics, windows, and exterior doors need to be tightly sealed. If the building you’re cleaning has a basement, use a dehumidifier, especially if it smells damp or musty downstairs.
When preparing an area to be cleaned, use administrative and engineering controls. Administrative controls will involve identifying and restricting access to contaminated areas and using measures to suppress dust and aerosol generation. Engineering controls mean ventilating the area and creating a contained atmosphere to protect workers and contain the mold. While personal protective equipment (PPE) for mold is a good idea, these steps can help minimize cross-contamination and illness even further, so these controls should be put in place ahead of time.
Mold Remediation Guidelines
There are four basic steps that the Department of Health has laid out for cleaning up an area contaminated by mold.
Perform a mold growth assessment. Remember that mold isn’t just about what you can see—the spores are microscopic, and the damage can run deeper than just what is visible. Wherever there’s a mold problem, there’s also a moisture problem. If you can pinpoint where the water is coming from, you can likely find the source of the issues, which will allow you to repair or seal the problem and work on eliminating further mold growth.
Remediate mold contamination. Clean up any mold-infected areas, taking care to avoid exposing yourself to the mold in the process. You’ll need to figure out the extent of the contamination to know what kind of commitment will be involved. Level 1 (up to 10 square feet) and Level 2 (10 to 30 square feet) of remediation is possible to DIY; for any contamination greater than 30 square feet, or in especially hazardous areas, mold remediation specialists need to be brought in to do the work.
Cleanup, which for Level 1 and 2 remediation consists of five different steps.
- Repair the water problem to avoid feeding the mold more.
- Isolate the area that needs to be cleaned.
- Clean the area. For Level 1 remediation, a damp cloth and detergent are sufficient, or natural mold cleaners like white vinegar can work. Level 2 will require using a HEPA vacuum and cleaning all surfaces with a damp cloth. Remove wet and mold-damaged porous materials by discarding them in thick, sealed plastic bags that are wiped down before leaving the contaminated area and throwing them in the trash.
- Look around for contamination and debris—you shouldn’t be able to see dust, dirt, or mold.
- Dry everything to eliminate excess moisture. Fans, dehumidifiers, and raising the indoor air temperature can speed up the evaporation process.
Check everything over again. Things should be visibly clean, but you should check for any more signs of mold damage (like damaged materials or odors) before deciding that you’re done. Implement or revise a comprehensive moisture and humidity management strategy once the mold cleanup is complete. The CDC offers a guide on mold remediation strategies for more information.
PPE for Mold Removal
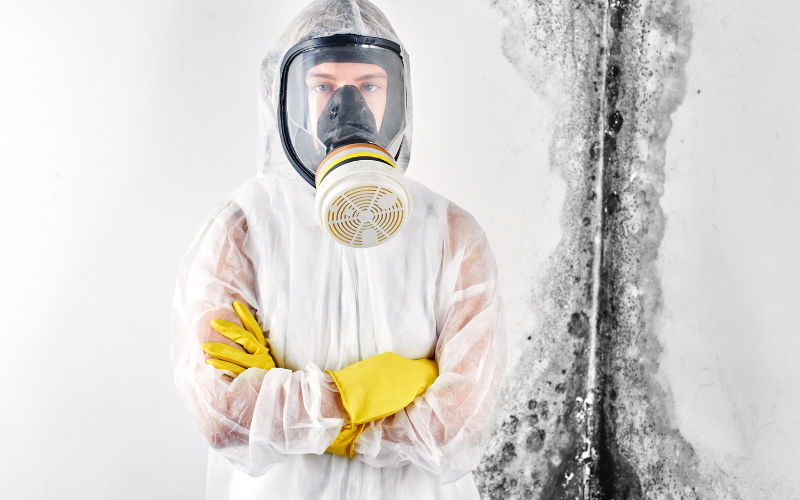
When administrative and engineering controls aren’t enough to control mold exposure, you’ll need to get some personal protective equipment (PPE) designed for mold removal. PPE is designed to protect the body from inhalation, ingestion, and any potentially harmful direct contact with mold spores. The absolute minimum requires protecting the skin, eyes, and respiratory system. Wear PPE as you’re cleaning and until you’re well out of the contamination area and done with work.
Skin protection will include clothing like long gloves, protective coveralls, hoods, and booties. Gloves should extend to the middle of the forearm. If you’re using chlorine bleach or another strong cleaning solution, choose natural rubber, neoprene, nitrile, polyurethane, or PVC gloves. Use latex or non-latex medical exam gloves in areas where you might be in contact with infectious materials or mold; household rubber gloves will work if you’re using mild detergent and water. Protective clothing can be reusable or disposable, but they should be worn carefully to avoid cross-contamination between infected and clean areas. Tyvek suits are a great example because they can protect your whole body and be easily donned and doffed.
Eye protection involves covering the eyes with safety glasses or goggles. Choose proper goggles with filtered ventilation for a mold remediation project. Full face respirators or goggles that block out small particles are necessary.
Respiratory protection includes masks and respirators that keep you from breathing mold in. Full face and half mask models of respirators are great for mold remediation projects as long as they work with your eye protection: N95, N99, and N100 masks, half-face respirators, and full-face respirators are all good choices. 3M and Moldex, two of the most popular and trusted brands in the safety business, offer protection against mold.
Outside of what you wear, you’ll also need extra equipment for the project. A vacuum with a HEPA filter can help with clean up and is a requirement for Level 2 remediation. Large sheets of heavy plastic that you can tape over doorways or air vents will keep mold spores from spreading to other areas even when you’re releasing them into the air with your work.